I was thrilled this year to be invited to be a part of Refashion Month with House of Estrela.
If you have been reading the blog for a while you will know that this type of project is my jam – especially kids clothes, and I had an absolute ball with this one:
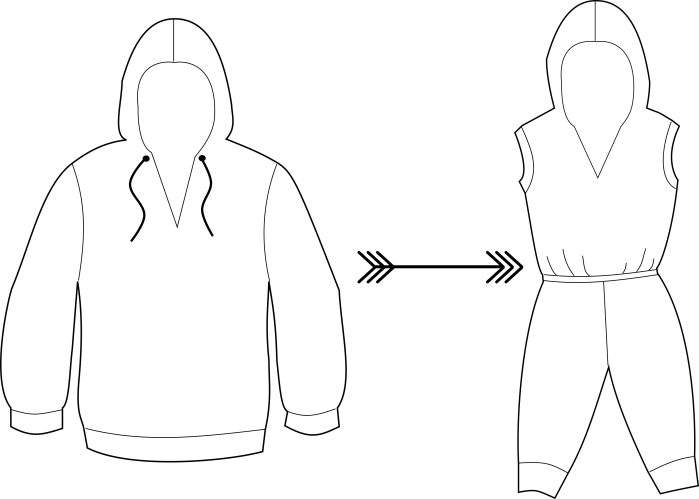
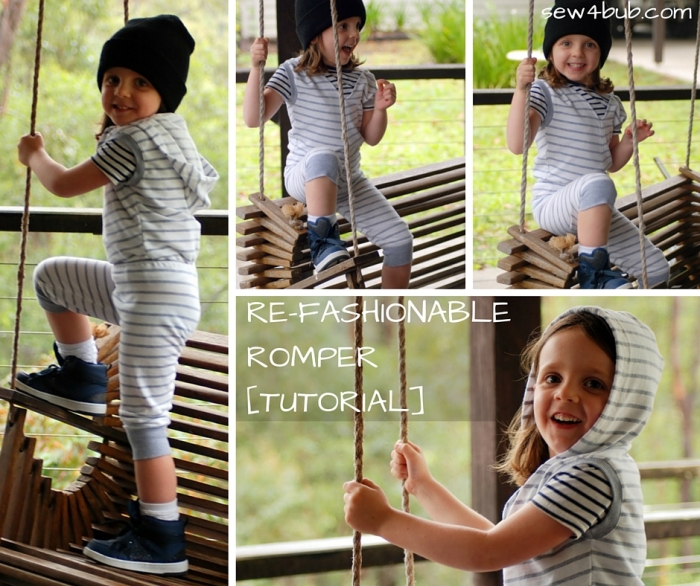
Introducing the Re-Fashionable Romper!
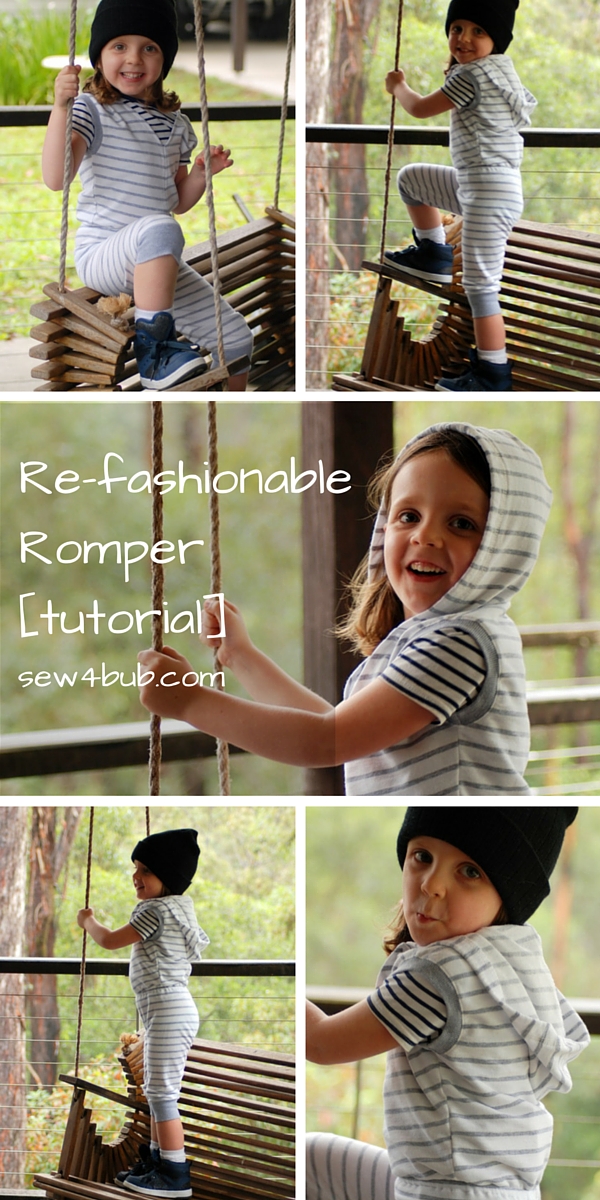
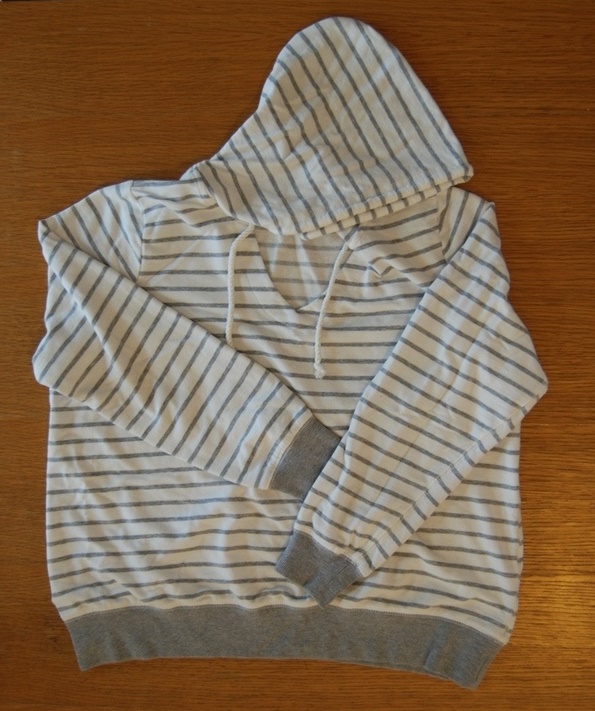
My mum, on cleaning out her cupboard, had given me this new, but quite ill-fitting hoodie – the perfect candidate:
An hour or so later and Hey Presto!

If you would like a run down on how to make one of these for a little person you know, read on. I didn’t take good pics of this process and have just provided a brief description here, if you would like more detail just comment and I will help out as much as possible.
- First thing is to make a pattern. I used a hoodie that fit my little girl well and a pair of close fitting tracksuit pants to get the general shape of the bodice, pants and hood sections. The only thing you need to remember is to add seam allowance at the waistband (of the bodice and the pants) to accommodate an elastic casing, a couple of cm or so depending on the width of your elastic. I used 6mm braided elastic so added 2 cm – 1 cm for the seam allowance and 1cm for the casing.
- Make a ‘V’ in your front pattern piece low enough to allow your little one to get the romper up and down over his/her body, and then adjust the length of the bottom of the hood piece to accommodate the reduced length of the neck hole. Remember to leave seam allowance on your ‘V’ so that you can turn it under.
- The only additional pattern piece I needed was for the bands on the sleeves. These were 5cm wide and the length I calculated by measuring the armhole and making the bands 80% of that measurement plus seam allowance.
- Next I cut my pieces from the hoodie like this:
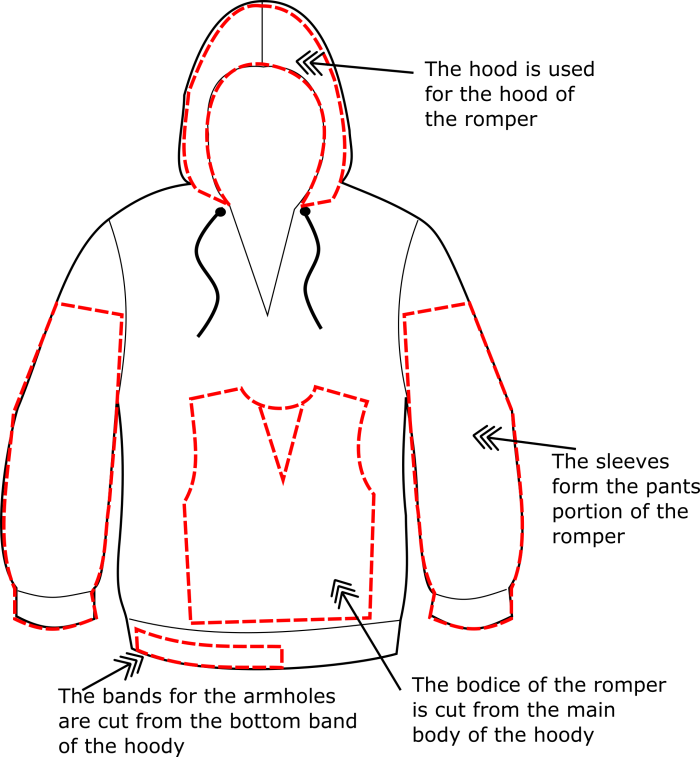
Now to sew it all up:
- Sew the crotch seam of the pants portion.
- Sew the shoulder and side seams of the bodice.
- Sew the bodice and pants together at the waist with the usual seam allowance then sew another line of stitching 1cm in from your first seam.
- Fold the new wider seam allowance down towards the pants and sew along the edge (leaving a 2 inch gap) creating a casing for your elastic.
- Insert your elastic, sew the ends of the elastic together and then close the opening in the elastic casing.
- Sew the bands to the armholes – this is a video I made on attaching knit bands:
- Sew the back seam of your hood (and top stitch) and then sew your hood to your neckline.
- Fold in and hem the ‘V’ neckline
Your done – try it on your little one and admire your handy work 🙂
If you have a go at making this little romper, be sure to grab some pics and hashtag them #SEW4BUB I would love to see your creations!
And for more re-fashion inspiration check out the rest of the Refashion month contributors on House of Estrela.

As always, thanks for reading.
Liz xx


Such a great refashion. She looks so happy to be wearing something that was once your mum’s. Now that there is a grand child in our family I’ll have to look at my charity pile with new eyes.
She is a happy little soul Libbyb54 🙂
I love this! I can’t wait for your fall line!
Thanks Karly
This is totally brilliant. I would make one first thing if I had a shirt on hand! My one concern is how to get it on and off a 3-5yo?
My daughter (the one pictured) is almost 4. It just pulls on from the bottom like tracksuit pants then the shoulders pull right over. That is why there is a deep v neck so that it comes on and off easily 🙂