Hi everyone, welcome to the blog, today I have a tutorial for how to make your girls some knickers, along with a Pattern-for-pennies sewing pattern for you.

Knickers are a relatively inexpensive item to buy, so you might be thinking why would you bother?? Well extreme cuteness for a start:
But as well as that, small projects like these are a great way to ease yourself into sewing with knits, if you need some practice, and a fabulous and fast way to use up your pretty knit scraps.
So let’s get into it.
You will need:
- Pattern-for-pennies Girls knicker pattern (or alternative). This pattern is girls sizes 2 – 10

- Enough knit fabric to cut your pieces from (amount varies with size).
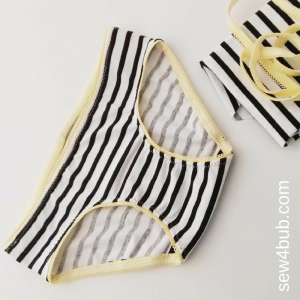
- Some 10mm (3/8 “) lingerie elastic (it has pretty edging and a super soft surface that goes against the skin).
- coordinating thread.

How to put it all together:

- Cut your pattern pieces from your fabric, and your elastic lengths according to the chart provided in the pattern.
- Place your front and back pieces together, with right sides facing and the crotch seam lined up. Place your gusset piece right side down on your back pattern piece as shown and sew the crotch seam using a stretch stitch or your serger.
- Lay your knickers out flat with the right side against the table and flip the gusset piece down so that it covers the crotch seam and baste it in that position as shown.
- Fold your knickers in half with right sides facing, and sew the side seams using a stretch stitch or your serger.

- Form a loop with each of your elastic pieces overlapping the ends by about 1cm (3/8”) and secure with a few zigzag stitches.
- Take the waistband elastic loop and your knickers. Line the flat edge of the elastic up with the top raw edge of the fabric with the right side of the elastic facing the right side of the fabric. Making sure that you stretch the elastic evenly around the top of the knickers (Dividing both in to 4 and pinning the corresponding point can help with this) zigzag the elastic to the fabric close to the loopy side of the elastic as shown.
- Flip the elastic to the inside and you will reveal the small decorated edge, with the remainder of the elastic covering the raw edge of the fabric on the inside.
- Top stitch around the elastic securing the raw edge and the elastic on the inside. Use a zigzag stitch for this as you need plenty of stretch in your finished knickers.
Repeat steps 6 to 8 with the leg hole elastic and you have yourself a super cute pair of knickers
Now I am sorry that I don’t have any modeled shots of these, but I am pretty sure when my kiddo’s are teenagers they are not going to be too keen to have shots of them in their knickers floating around on the internet. So you will have to do with flat lays for today, but trust me, these are too cute. And it is so satisfying to see those cute little butts running around in hand made knickers!


If you make some knickers, be sure to grab some pics and hashtag them #SEW4BUB
I would love to see your creations!
As always
Thanks for reading
Liz xx


