
DIY Hand Stamped Custom Clothing Labels
To get you started I have put together a mini stamping/printing project that is a really great way to try it out and see if you like it as much as I do.
To get you started I have put together a mini stamping/printing project that is a really great way to try it out and see if you like it as much as I do.
For a couple of years now there has been talk of brilliant new gizmos that can project your sewing patterns directly onto your fabric so that you can skip all the printing and taping, cutting and tracing and go straight from digital pattern to fabric. This is such a great idea but, but I haven’t…
 DIY/Tutorials / FREE Patterns / Pattern Hacks / Sewing for Mums / Summer projects / Thread Faction Patterns
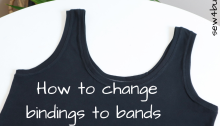
If you follow my pattern making adventures you will know that I am a binding girl, I sew knit binding all the time and I love the finish, but we all have something that is not our favorite thing to do (mine is gathering). So what do you do if you hate knit binding with…
We have 2 new patterns that have launched, and one of them is completely FREE for you guys!
 DIY/Tutorials / FREE Patterns / Pattern Hacks / Sewing for Mums / Summer projects / Thread Faction Patterns
Now I can’t tell you for the life of me why I didn’t add pockets to the #206 Ladies Retro Gym Shorts pattern to start with. But I thought it presented a good opportunity to do a post about adding pockets to, not only this pattern, but to pretty much any knit shorts (or pants for that matter) pattern that you have.

We are so excited over at Thread Faction HQ to be introducing you to our newest ladies pattern The #203 Ladies sport skort, but I also thought it was time for a new FREE pattern, so today’s post is a 2 for 1 deal 🙂

For anyone who has been reading for a while, it will be no surprise that I am in love with the concept of Zero Waste fashion design. Someone who is big in this space is Zero Waste Daniel This little clip gives you a bit f a run down on what Zero Waste Daniel is about.…
So, it has been a while, but I am adding to my Youtube channel again today, continuing on my series of videos demonstrating some basic knit sewing techniques that I use in my patterns. I will be posting more tutorial videos as well as demo videos on how to sew my patterns on there, so subscribe to my channel…
Well I know that you have been waiting with baited breath, but finally, the results are in and it’s Made By Me for the win!! If you have no idea what I am talking about, check out the original post for all the details, but the general idea is this: A little over a month…
I sew A. LOT. and although I would like to say it was, by no stretch of the imagination is everything I make up-cycled, zero waste or otherwise sustainable or eco-conscious. There are some occasions though, where it just makes sense to take the eco option. Picture this: You are shopping for sweater knits. You…
If you watched the recent ABC series War On Waste you were probably as surprised and appalled as I was to find out that in this country (Australia), we throw away 6000 KG of fashion and textile waste every 10 minutes. In the episode covering the issue, the waste was put down to our love of…

I made myself some new capri length lounge pants this week for kicking around the house in, and they are JUST. SO. COMFY. I had nothing else scheduled on the blog so I thought this was the perfect opportunity to share the love 🙂 I have got for you today a Pattern-for-pennies!! A capri length…

Between the generous bags of hand-me-downs from friends, and the clothes that I make, my kids wardrobes were getting overrun with clothes. Despite this, the kids never seemed to be able to find/put together a respectable outfit. I love my kids (4 and 6 years) having their independence, and being able to express themselves through…

Hi everyone, welcome to the blog, today I have a tutorial for how to make your girls some knickers, along with a Pattern-for-pennies sewing pattern for you. Knickers are a relatively inexpensive item to buy, so you might be thinking why would you bother?? Well extreme cuteness for a start: But as well as that,…

My husband has this saying that he likes to bring out when either of our daughters mentions that she wishes that life was this way or that, or that she had this trinket or that. He likes to tell them to hold out their hands, and then he volunteers to spit into one while they…


